Getting Started with the REV Driver Hub
- ftc18183
- Jul 7, 2021
- 3 min read
The REV Driver Hub is an optional replacement for the Android Phones which were previously used to connect to the REV Control Hub. Many FIRST teams have had connection issues with the phones and robot during competition and this new tool aims to solve this problem. Our team, Rounded Cube, has gone through the necessary steps to get started with the new device and in order to make the new technology easier for other FIRST teams, we have compiled some instructions to help your team get started.
In this blog post, we will provide easy instructions from powering on the REV Driver Hub to initial software updates. If you are interested in connecting the Driver Hub to Control Hub check out this post here.

Step 1: Inserting the Battery
The first step to get the REV Driver Hub turned on is to insert the battery. This can be inserted in the bottom of the Driver Hub and the cover must be screwed on over it to keep it secure.

Tip:
You should have received the Driver Hub battery pictured on the left with your REV Driver Hub Purchase.
Here’s how to Charge it:
1. Plug the orange wire (usb c to usb a) into the power adaptor and into the USB C port of the Driver Hub.
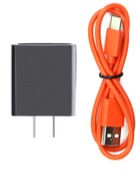

2. The power adaptor can be plugged into a wall outlet. Now the Driver Hub should be charging.
Step 2: Turning the Driver Hub On and Off
The next step is to learn how to turn the Driver Hub off and on. The power button can be found on the side of the Hub with the ports. Pressing it once will turn it on and the screen should light up and a green LED next to the power button should light.

To turn the Hub off, the power button must be held until a pop up on the screen provides an option to power off the Driver Hub. Simply pressing the power button once will not turn the device off but put it in sleep mode as the green LED will remain on.
Step 3: Initial Set Up
When using the Driver Hub for the first time, the device will attempt to connect to a wireless network to install updates. You must complete this process before using the Driver Hub.
Here’s how to do it:
1. When using the Driver Hub for the first time, the device will attempt to connect to a WiFi network. You must provide a network with connection for the device to install updates. Do not connect to your robot's WiFi as this will not provide an internet connection to perform the required updates. Pictured below is the screen you should see for connecting to WiFi.

2. Confirm the date and time settings displayed on the next screen are correct before proceeding by the Next button.

3. The initial set up is complete! You may select finish to proceed to the software updates required for the Driver Hub.

Step 4: Initial Update
The final set-up step for the Driver Hub is the initial update. After completing step 3 above, the software manager should automatically open. Select the update all button to start the installation of software updates for the Driver Hub.


Tip:
These updates may take several minutes to complete. Make sure to plug in the Driver Hub during the updating process.
What's Next?
After you complete the steps above, the Driver Hub should be ready to use. The next step to get the robot running is to connect the Driver Hub to the Control Hub. We have created a sequel post to this one in order to help your team get this connection set up. You can find this blog post here.
If you liked this post or found it helpful, please share it to help other teams!


Now a days all kinds of functions optimization is done with the help of DriverHub Patch